

Background:
Over time the factory reflective coating on the 75-85 Volvo 240 front turnsignal housing fades away to a dull black. Once these parabolic reflectors lose their reflective coating, the turn signals and running lights are much harder to see, especially at night. Fortunately bringing back the shine and the safety of a brighter turn signal is a very easy and cheap process.
Some early 240's (-80) have two-screw Hella front turn signal assemblies with reflectors built into the housing. If you have those Hellas you will have to mask off the plastic reflector lens and paint only the parabolic reflector surface. Slightly more work than the later 3-screw Cibie units but still easy and effective.
Parts required:
Some masking tape and newspaper or other suitable material
1 small can of chrome or metallic spray paint.
Phillips screwdrive to remove the lenses.
Prep the reflector:
I always disconnect the battery as a first step around electrical. Never hurts to be careful.
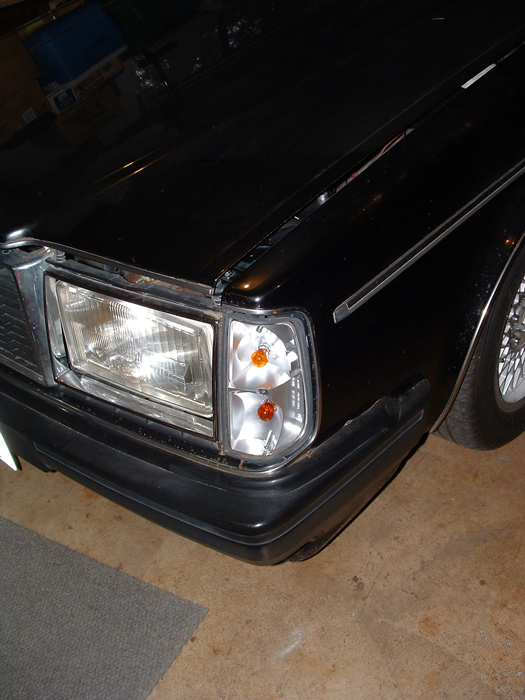
Remove the three phillips screws holding the lens to the turnsignal housing and put the lens somewhere safe. This might be a good time to swap the amber reflectors for clear ones if you wish. See the article here if you want.
Clean the housing with soap and water, then with rubbing alcohol. I have found the paint adheres fine without sanding at all, so I don't bother.
Carefully mask off the reflectors (see image below), make sure that no paint will slip through and get on the car's paint. Alternatively you can remove the entire turn signal housing if you want.
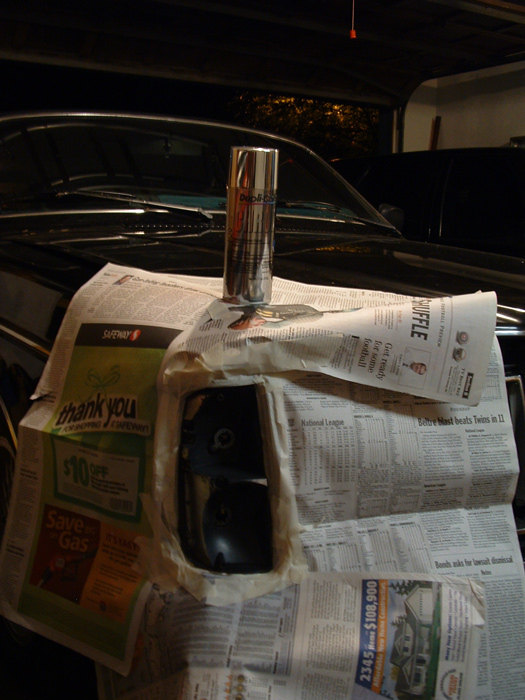
Now remove both bulbs if you plan to reuse them and plug the holes with a bit of newspaper to keep paint off the contacts. Alternatively just toss a couple of old burned out bulbs in and spray away.
Spray the paint per the directions, making sure not to overspray on the car's paint.
Putting them back together:
Make sure the paint has dried properly, then carefully remove the masking tape and paper. Reinstall the bulbs and
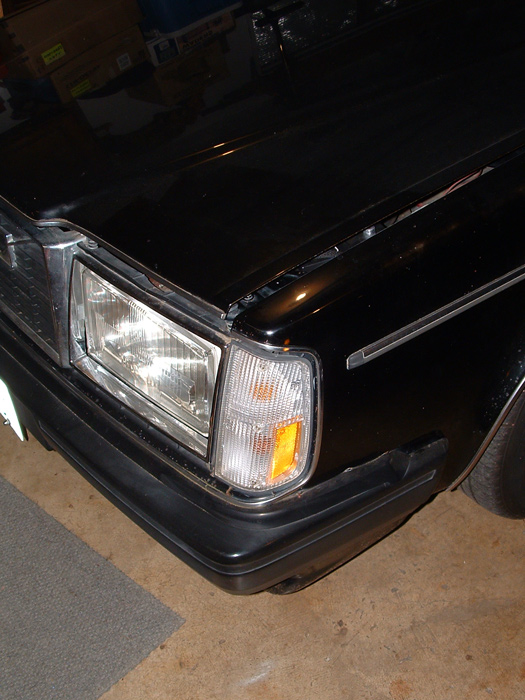
Once your lenses are ready and the housings are dry, reattach them to the car, connect all wiring, reconnect the battery and you're ready to go.
Final Product:
The front of your car should now look like this. Congratulations!
Additional Note:
The same procedure can be used on the reverse lights of the 79-93 240 sedan taillights when you need to replace the clear reverse light lens.
This page © neptune242 and last updated on September 7, 2008
All contents property of neptune242.com unless otherwise noted.
Send all feedback to the address above.